Webhooks and Callbacks
Some long running processes wait for notifications of certain events from other systems. Such notifications are often done with a webservice call.
Such calls are known as webhooks or callbacks.
This tutorial will show you how you can simulate such an asynchronous call on receiving an inbound call.
Scenario
Suppose your system-under-test uses a ToDo-system. It does a webservice call to create ToDo-items. The ToDO system responds with a message containging an identifier and
once such a ToDo action is done or canceled, the ToDo-system notifies the system-under-test with a message containing that same identifier for correlation. After receiving such a notification, the system-under-test can continue it's own processing.
It is your job to realize a virtualization for the ToDo-system and you want the complete tests without any manual intervention.
The ToDo-system has a REST-API to create ToDo-items and your system-under-test has a Soap/XML interface to receive notifications.
ToDo-items can get completed but can also get aborted.
Solution
After receiving a ToDo-item the virtual-todo system will immediately reply with a generated identifier and then wait for 3 seconds to send a notification to the system-under-test.
If the description of the ToDo item contains Abort, it will notify with an aborted message else with a completed message.
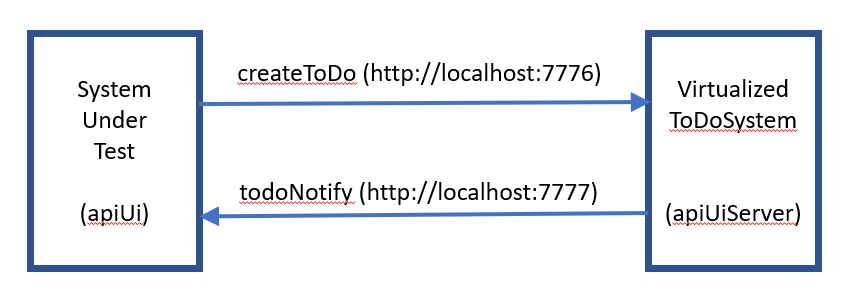
In this tutorial, we will let apiUiServer, listening on port 7776, simulate the ToDo-system and apiUi, listening on port 7777, simulate the system-under-test.
Development of the ToDo-simulation will of course be done with apiUi.
To develop the solution we will:
- Develop the virtual ToDo
- Save the project
- Start apiUiServer
- Push design to apiUiServer
- Test our solution
Develop the virtual ToDo
We want the virtualization to be able to simulate the createToDo call and to do the callback. Therefor we have to import both the OpenApi-specification and de WSDL.
The operation todoNotify is an outbound one so we will have to change it's direction and specify the endpoint. No need to enter path-information because with Soap/Xml that is taken from the WSDL.
For the operation createToDo we will apply some scripting, first assign data for the synchronous reply and then apply the function RequestOperationLater to do the asynchronous callback.
- Start apiUi and make sure it listens to port 7777
Extra->Options - Introspect the Wsdl and OAS
Project->Maintain Wsdl and API files...
Copy the link Wsdl-Specification and add it to the list
Do the same with the link OAS-Specification
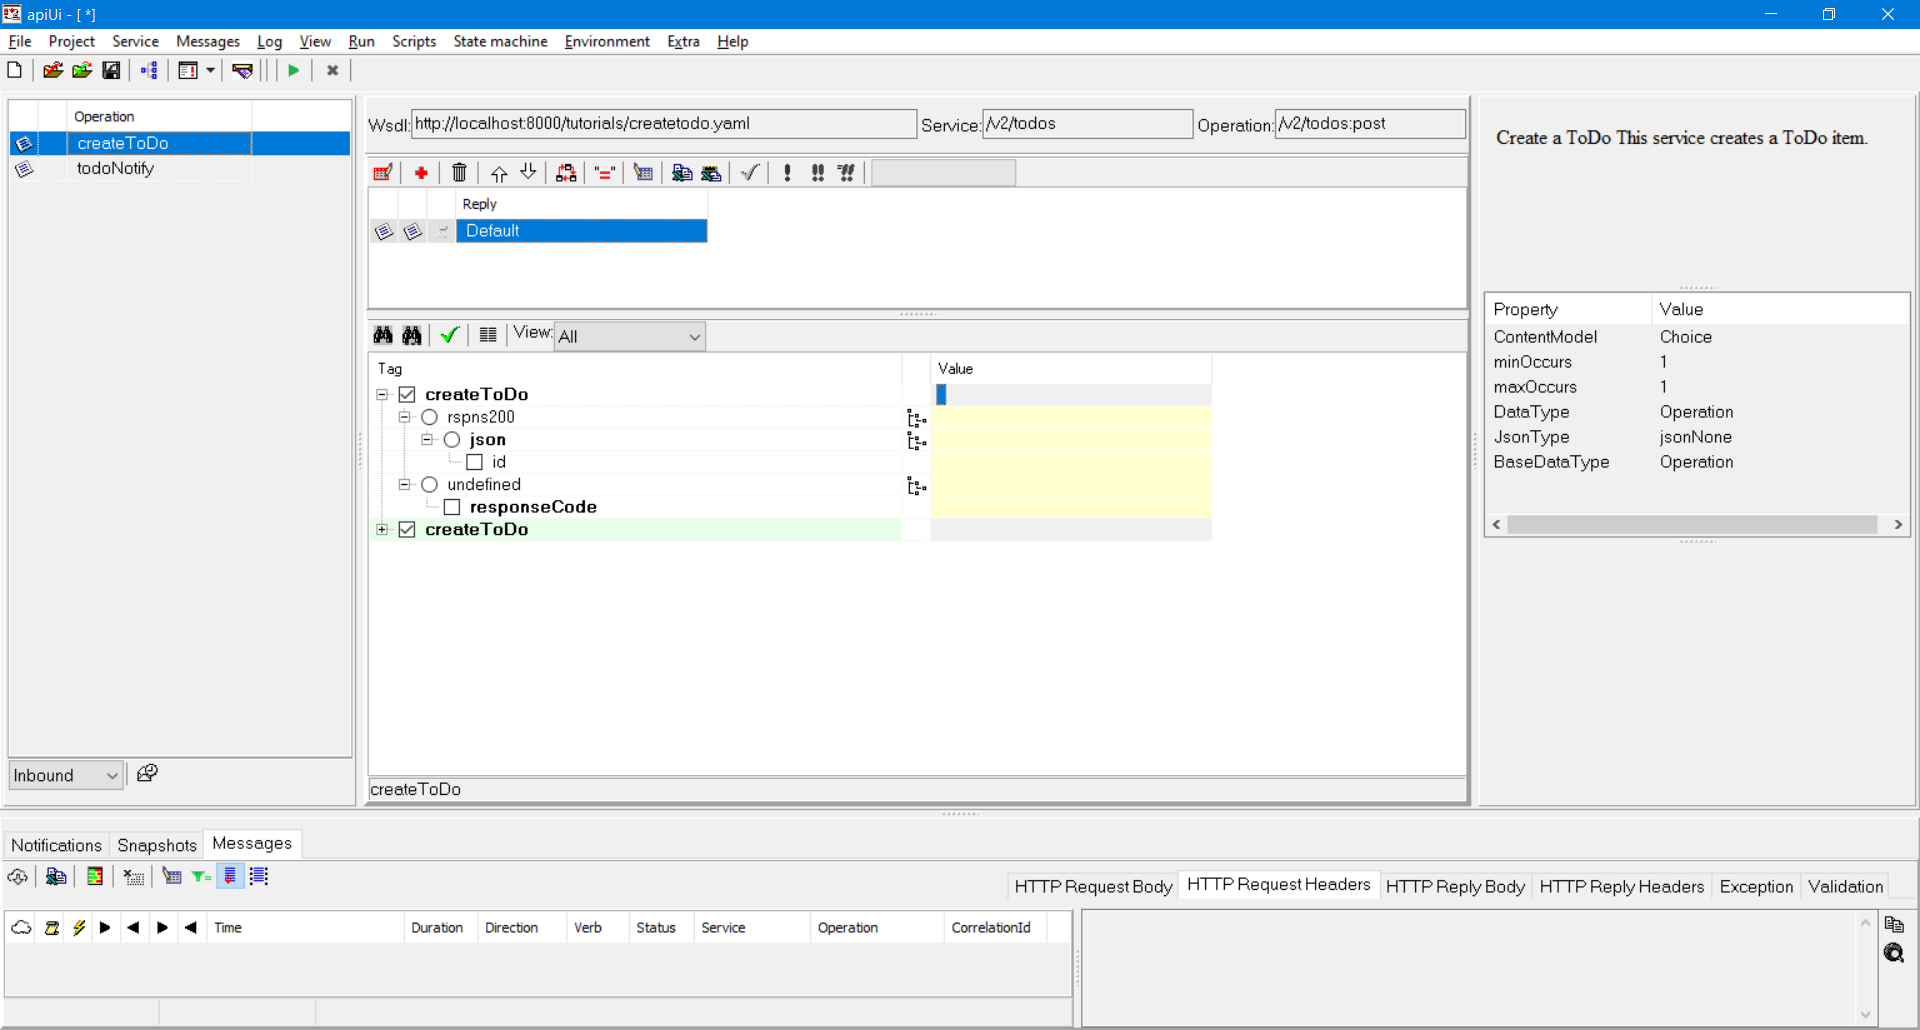
After returning to the main screen apiUi will look like this:
- Select the
todoNotifyoperation and set it toOutbound - From the operation's context menu choose option To address... and navigate to the 'Address' item and enter
http://localhost:7777
Since this operation will be filled with data and triggered fromcreateToDo, we are now ready with this operation. - Select the
createToDooperation. - To be able to set values for the
todoNotifycall from thecreateToDoit is needed to invoke thetodoNotitfyoperation fromcreateToDo.
From the context-menu choose Options..., click on the helper-button at elementscripts.invoke.operations.nameand select the only candidate-operation beingtodoNotifyand confirm your choice - Open the 'createToDo' script by clicking on it's script-button and enter below code there, this code will:
- fill the response for the
createToDocall - fill the request for the
todoNotifycall - send the request asynchronous after 3 seconds
- fill the response for the
Rpy.createToDo.rspns200.json.id := GenerateGUID ();

with Req.ToDoNotificationRequest do
{
  .todoNotify := Rpy.createToDo.rspns200.json.id;
  .status := ifthen (StrHasRegExpr (Req.createToDo.json.description, 'Abort'), 'aborted', 'completed');
  RequestOperationLater ('todoNotify', 3000);
}
Save the project
Because we are ready with developing the virtual ToDo, next step is to save what we have created.
Choose menu-option File->Save Project as...
apiUi projects are saved to disk in a folder structure. There is a restriction to the root-folder name, it must end on .svpr.
After clicking on the Browse LAN button, you can first select a parent folder for your project and append a suitable name for your project. Again, remember it has to end on .svpr.
Start apiUiServer
Submit below command from a command shell:
..\apiUiServer\apiUiServer --port=7776
Depending on your OS and location of apiUiServer, the command may differ.
apiUiServer will start listening on port 7776. Because we did not specify a project, it will not yet be able to do any simulations.
Push design to apiUiServer
We now have the virtual ToDo in apiUi but we want to have it in the apiUiServer instance we just started.
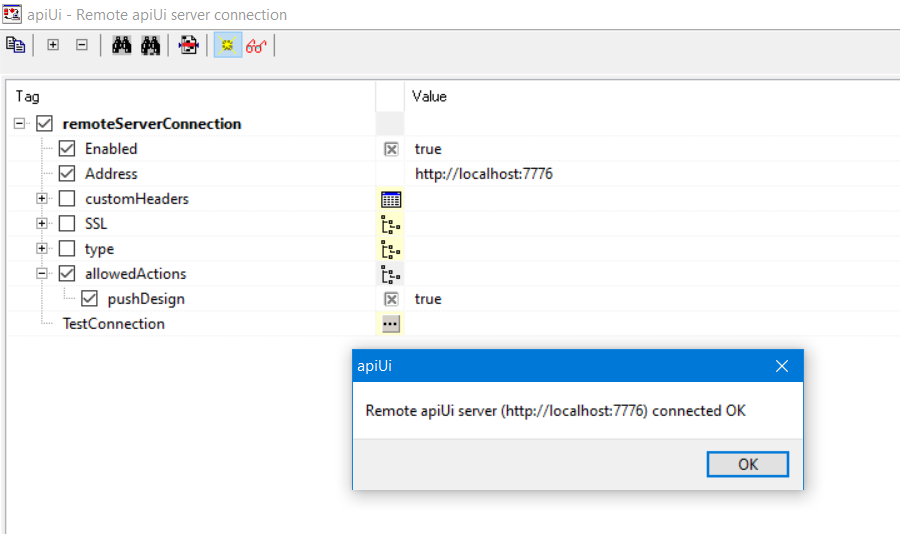
First set-up a connection with apiUiServer. Choose the menu-option Project->Set remote server connection (Shft+Ctrl+Alt+C) and fill in the form that pops-up as shown below and press on the button TestConnection.
 If your connection is ready, you can now push your design to apiUiServer, choose menu-option Project->Push project to remote server (Shft+Ctr+Alt+S).
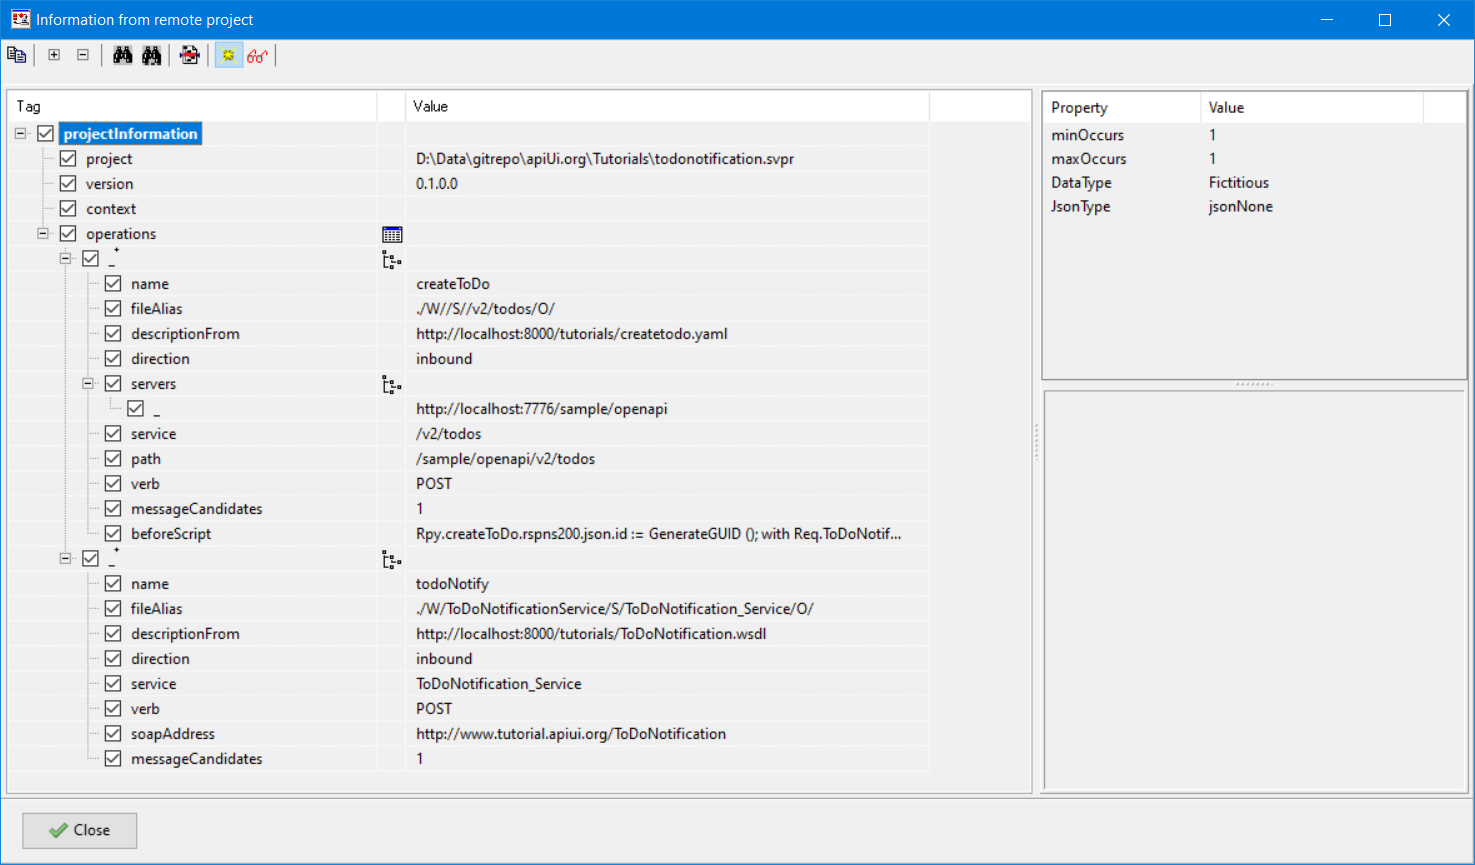
On receiving a project, apiUiServer will become unavailable for a while (since this is a small project, you will hardly notice) but after that you can see that the project is loaded in apiUiServer by choosing menu-option
Project->Infomation from remote server.
Test our solution
- Choose menu-option File->New Project (Ctrl+N),
- Introspect the Wsdl and OAS again
Project->Maintain Wsdl and API files...
Copy the link Wsdl-Specification and add it to the list and do the same with OAS-Specification - Change the direction for the
createToDooperation toOutbound. - Enter some data in it's request and send it to the virtual ToDo application Ctrl+G.
- After around 3 seconds you will see the callback for
todoNotifyappear in the log. - Change data for the
createToDoin such a way thatdescriptioncontainsAbortand send the request again. - Note that the status in the callback now equals
aborted.